|
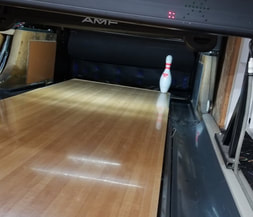
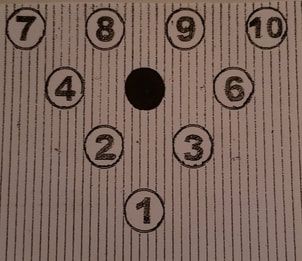
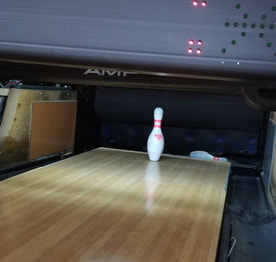
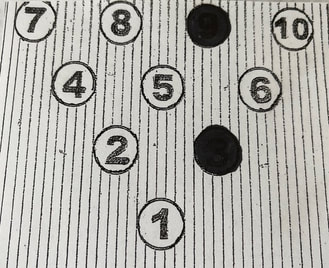
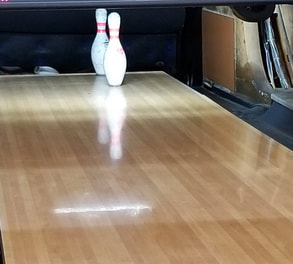
Last week we discussed the” 3-6-9” method. Today I’d like to discuss converting the 10 pin in a little more detail. The 10 pin can be a bit tricky for the right handed bowler. Your ball needs to be hooking or it can drop off into the “Gutter” or “Channel”. If you are standing on the 22nd board at the stance to convert the 1 pin for example, then you would need to stand on the 31st board to convert the 10 pin according to the 3-6-9 method, since the 10 pin is 9 boards over from the 1 pin. When I began to bowl, I was terrible at making the 10 pin and my scores were low because of it. I was getting so frustrated and decided to just talk to some of the better bowlers in my league. Two of them told me that they bought a cheap plastic ball to use for the 10 pin. I didn’t know it, but Plastic Balls do not hook, so I took their advice and went to the pro shop and purchased a plastic ball. I went practicing and just kept my palm flat and released the ball out over the middle arrow without any turn of my wrist. I started making so many more 10 pins after that and was thrilled with my higher scores! I’m not saying you must do this, but if you throw a large hook and have trouble making the 10 pin, then this may be the answer for you. I'll discuss more on this in a later Blog Post. The 5 pin, or “King Pin” as it is sometimes referred to, is in the very center of the lane. You need to aim for this pin because without hitting it, you will not be able to get the domino effect that knocks it into all the other pins, resulting in a strike. Sometimes I’ve seen people throw a large hook and barely touch the headpin (1 pin) but still manage to get the strike. The thing is, it’s NOT consistent. In bowling CONSISTENCY is a huge factor in the game! By now you should know where to stand and which arrow or board to aim at for the 1 pin. The 5 pin is directly behind it but a bit furher back on the lane. Since your ball will have a little more time to hook, you need to compensate for this by moving a few boards to the left, or on the 24th or 25th board. You should have an idea where to stand for the 2 pin and 3 pin. Since the 8 pin is directly in back of the 2 pin, and the 9 pin is directly in back of the 3 pin, you just have to apply the same principal as you did for the 5 pin, by moving slightly left again. This should do the trick. If you try this and you miss, remember Rule # 3 from the previous week. If you miss to the right, adjust by moving to the right a board or two. If you miss to the left, move a board or two to the left. You can move at the stance, or at the arrows but be consistent. Double Wood Spares: Double Wood just means that there are 2 pins left on the lane you need to convert, and one is directly in back of the other. Examples are the 2-8 and the 3-9 pins. If you only convert one of those pins, it is referred to as a “Chop” or “Cherry Picking Off” the spare. If you throw a perfectly straight ball, this one may be easy for you to convert. The right handed hook bowler needs to move left because the weight of the pin will deflect the ball slightly to the right and you might miss that back pin. The left handed bowler needs to do the opposite, or move slightly more to the right. Just experiment when you are practicing to see what will work best for you according to the size hook you throw. Check out my new ebook on Amazon/Kindle--"Let's rev Up Those Bowling Scores". https://www.amazon.com/dp/B09ZSMB99G/ref=sr_1_2?crid=P3PQWHFB1WYS&keywords=lets+rev+up+those+bowling+scores&qid=1652035291&sprefix=lets+rev+up+those+bowling+scores%2Caps%2C76&sr=8-2 Join me here next week when I'll be discussing "How to Make Spares-Part 3"---"Cluster" and "Bucket" Spares. See you then, Good Luck and High Scoring!
0 Comments
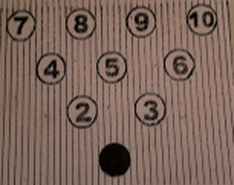
I hope you had a chance to practice your timing at the lanes this past week, and that you have been able to remember the order in which the pins are numbered on the pin deck. Anyone can get a strike, but the bowlers who consistently make spares, will end up with the highest averages!! Rules: Memorize these rules to make it easier when making your spares: 1. Moving 3 boards where you STAND on the approach equals one pin difference on the pin deck. 2. Moving your Target 2 boards at the ARROWS equals one pin difference on the pin deck. 3. Moving left on the lane will cause your ball to go more to the right, and moving right on the lane will cause your ball to go more to the left. (This will be the opposite for the left handed bowler). You can easily apply what is called the 3-6-9 Method to make your spares. Knowing where to stand for your strike is important and will help you to be able to convert the 1 pin. To the right of the 1 pin is the 3 pin. According to rule number 1, all you need to do is move 3 boards to the left of where you stand for the 1 pin to be able to convert the 3 pin. If you stand on the 22 board for example, then move left to the 25th board. Use the same target (arrow) you use for the strike. The next pin to the right of the 3 pin is the 6 pin. To convert the 6 pin, you need to adjust by moving over 6 boards from where you stand for the strike or the 28th board. As you move left, you are coming in at a larger angle, so you must also move the target over to the left. Try aiming 3 boards to the left of the 2nd arrow and experiment from there. You may have to move a board or two one way of the other depending on the size of your hook. For the 10 pin, you must move 9 boards to the left of where you stand for the strike at the stance, and move your target at the arrows a few boards to the left. To convert the pins to the left of the headpin, you must move to the right at the stance according to rule # 3. So for the 2 pin, 4 pin, and 7 pin you must apply the same rules as above by moving to the right 3 boards from where you stand for the strike to convert the 2 pin, 6 boards to the right to convert the 4 pin, and 9 boards to the right to convert the 7 pin. Again, you need to move your target at the arrows to compensate for the larger angle. Do your best to go to the the lanes and practice this week. Good bowling takes time, and If you do things right from the start, you're going to improve more quickly! Try this 3-6-9 method for your spares and adjust a board or two when necessary because everyone throws the ball slightly different, and some have a bigger hook (curve) on their ball the others. Next week I'll be discussing How to Make Spares- Part 2. See you then. Good Luck and High Scoring!! I bowl with my right hand, so the following information will be instructions for a RIGHT HANDED BOWLER. Just do the opposite if you are a left handed bowler.
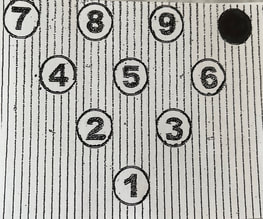
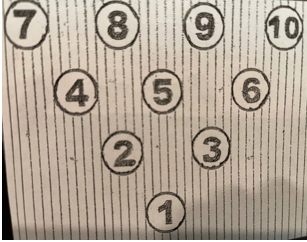
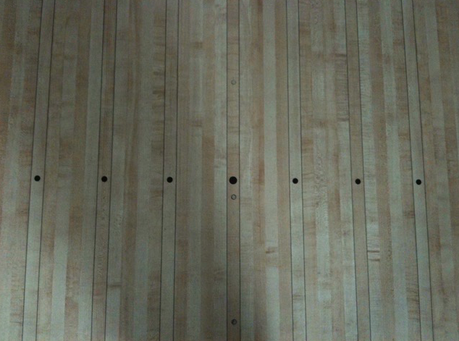
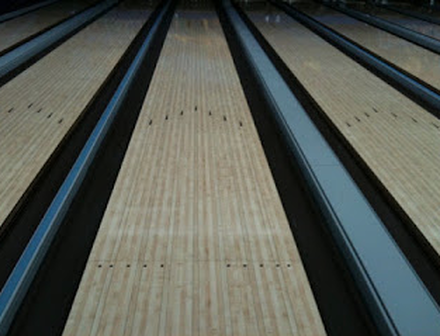
Type your name into the computer, and the lane will automatically turn on. When not bowling in a league, you are in "Open Bowling" and there are no free practice frames allowed. You can throw the ball a few times anyway to make sure you can throw and release the ball comfortably, but it will start the scoring. If it's too light or too heavy, just go get a different ball to try. Now, without using your ball, walk up to the foul line and then turn around and face away from the pins. Take one large step, and 4 more regular steps like you do when normally walking. Stop and look down. This is where you will stand when you first begin to bowl for a "Five-Step Approach". You could take a "Three-Step Approach" or "Four Step Approach" if you prefer but I have tried all three and came to the conclusion that five works best for me. **To begin, place the Center of your left foot on the center board of the lane which is approximately the 20th board or 5th DOT counting them from right to left (left to right for the left handed bowler). Now facing the pins and without your ball, bend your knees slightly. Walk this "Five-Step Approach" with a good push away on the fourth step to get a little speed, and then a slide on the last step. Stop at the foul line but do NOT go over it. (In league play, going over the foul line would result in a foul and the pins you may have knocked down will NOT be counted). If you go over the foul line, just step back a little on the next try. Repeat this several times so you can get the "" of how the timing will be with your footwork and arm swing. **Again, pretending to hold your ball, rest your elbow on your right hip (so you don't have to feel all the weight of the ball once you are using the real ball) and swing your arm very slightly out to the right side to allow for BODY CLEARANCE when the ball comes down next to you as your arm comes down and into the swing (the Downswing). Get in the habit of holding it the same way and distance out each time for consistency. You don't want to have it close to your body one time and then a little farther out the next. CONSISTENCY is the key in getting a high average!! You can also support some of the weight of the bowling ball with your left hand under it if needed. **Bend your knees slightly and keep them in that position throughout all of your steps, and try to walk as straight as possible. STEPS: This will be for a five step approach. 1. Take the first step with your left foot (right for the left handed bowler) and do nothing with the arm holding the pretend ball. 2. On your second step, push the pretend ball away from the body out and in front of you, letting the weight of the ball come down naturally, without forcing it. 3. On the third step, the arm should be straight down next to your body. 4. On the fourth step, the arm should be in back of the body and at the height of the backswing (about shoulder height) and give a little more push with the right foot to pick up some speed. The left arm should go slightly out to your side to help with balance. 5. On the last step, the ball comes down from the backswing and is RELEASED when it is near your left ankle. The left foot should have a nice slide as you release the ball. Keep that left arm out to the side, and the right foot should be in back of you or out ONLY SLIGHTLY to the left side also to assist in your balance. **After the ball release, continue to bring your arm upwards toward the ceiling and touch your back. You need to have a smooth release as if you are landing a plane. If you just pitch the ball out there into the lane, the ball will lose some of it's momentum the power behind it by the time it reaches the pins which are sixty feet away. Do this motion without the ball several times so you can get the feel of the timing with the arm and feet. The arm swing should mimic the pendulum on a grandfather clock. When you start to feel comfortable with the motions, do it a few more times but look down at the foul line to make sure your left foot is on the same dot that you started on. That will indicate that you are walking fairly straight along the Approach. When your timing feels comfortable, try these steps and arm motions using the real ball aiming for the second arrow (from the right counting to the left, and opposite for the lefty). Remember, this is only a starting point. Now insert your FINGERS into the ball first, and the thumb last. The idea is to get a STRIKE (getting down all ten pins) on the first try. The right handed bowler needs to get the ball into the 1-3 area of the pins (the 1-2 area for the lefty or left handed bowler). This is called the "Pocket". The picture below shows how the pins are numbered on the pin deck. Try your best to memorize this so when I begin to discuss spares and certain pin numbers, you will know exactly where they are located. The 1-pin is darkened in the photo. If you want a four step approach, begin your walk on the approach with the right foot and on the first step you must push the ball away from body and feel a smooth rhythm, and finish with a nice slide on your left foot. Join me next week on Part 1-"How to make SPARES-Part 1". I hope to see you then! Good Luck and High Scoring!! The Bowling Lane consists of 39 boards across, each being about an inch wide. Years ago they were only made of wood but today they are mostly made of synthetic materials. The bowling lane is 42 inches wide, and 60 feet long. Each individual lane costs about $45,000 to have built in a bowling center and the amount of lanes can vary in each center, or House depending on how much space they have. But the average is about 26 lanes across. I bowled in a tournament in New Jersey once that had 100 lanes across, 50 being made by Brunswick, and the other 50 were made by AMF. These are two companies that make all kinds of bowling products. https://brunswickbowling.com/. https://en.wikipedia.org/wiki/AMF_Bowling The area on the lane that you first step onto is called the "Approach". When you walk onto the approach, there's a set of "Dots". Some bowling centers have 5 and some have 7 and each of the dots are equal to 5 boards. The dot in the center is also the center of the lane which is the 20th board, and is usually a bit larger than the other dots. Try to remember this. There is a line across the lane where the lane actually begins and is called the "Foul Line".There are 2 lights with sensors, on each side of the foul line, and if you cross this line on your ball release during league play, whatever pins you knocked down will not be counted in your score and the pins will be automatically be re-set. Your score will be marked as an "F" meaning that you fouled. Just passed the foul line there is another set of dots that line up with the first set, and even farther down the lane there is a set of "Arrows" which line up with both sets of dots.These dots and arrows are there to help you figure out where to stand, and to also help you figure out the best "Target" area to release your bowling ball. On the lane, a sheet of oil is put down by a special oiling machine. Years ago the oil was put down to protect the wood which the lanes were made of. Now it is put on for more of a challenge for each player, because different oil patterns are put down which I'll be discussing later on in my blog. At the end of the lane is a set of 10 pins which sit on the "Pin Deck". They are 15 inches high weighing about 3 pounds each, give or take a few ounces. The object of the game is to be successful in knocking all 10 pins down on the first try which is called a "Strike" and marked by an "X" in the score. If you are unsuccessful, you will only get one more try to knock down the remainder of the pins. If you are successful knocking down the rest of the pins, you will have made a "Spare" which is marked by a slash /. If you are unsuccessful in knocking all the pins down after your second try, then you will have a "Miss" or an "Open Frame" which is marked by a dash - (I will go into more detail on scoring a bit later in the blog). You will also notice the black area on each side of the lane. These are called "Channels" or "Gutters". They usually have "Gutter Guards" over these areas in children's leagues so they don't get a "Gutter Ball" or a miss. In an adult league, they are open and you want to avoid your best throwing the ball in the channel because that would mean that you have missed getting the strike or spare. Sometimes if a pin gets stuck in the channel, a bowler or the mechanic at the bowling center will have to roll a ball into the channel to get the pin out of the way. It can be a distraction to some bowlers. Check out my new ebook on Amazon/Kindle, available for only $14.99, "Let's Rev Up Those Bowling Scores"!! https://www.amazon.com/dp/B09ZSMB99G/ref=sr_1_2?crid=P3PQWHFB1WYS&keywords=lets+rev+up+those+bowling+scores&qid=1652035291&sprefix=lets+rev+up+those+bowling+scores%2Caps%2C76&sr=8-2 Join me back here again next week on when I'll be discussing "How to Get Started in Bowling-Part 2". I hope to see you then! Good Luck and High Scoring!! In order to get started, you will need certain equipment. Having your own "stuff" is really best because consistency is very crucial in the game of bowling. Buying good equipment will cost you approximately $400, and if you want to spend more that's totally up to you. They sell everything you will need right in the pro shop located in the bowling center, or you can purchase items online. You will need a ball, shoes, and small towel to begin.
The Bowling Center (or Bowling Alley) has equipment that you will need if you don't want to purchase anything right away. They rent SHOES at the front desk for about $3-$4 (you will need to pay in advance) and the games costs approximately $3 each, which you also need to pay in advance. Make sure to bring a pair of socks! They have BOWLING BALLS you can use for free on racks located around the bowling center. Try to get one that feels just right when you insert your fingers. If it's too loose, you may drop the ball and injure yourself, and if it's too tight, you may not be able to let it go and you may end up partially on the lane which is slippery from a coating of oil. (I will be discussing Equipment in detail in a later blog post). The pins have weight, and the ball will be deflected slightly, so don't get one that is too light. Start out with at least a 10-12 pound ball if you can, and try to work your way up to 15-16 pounds which will carry the pins better! Now that you have a ball, shoes, and towel, just type your name into the computer and let's get ready to begin! Meet me back here next week when I will be discussing the Parts of the Bowling Lane. I hope to see you then! |
AuthorHello!! My name is Joanie. Although I'm not a professional bowler, I have loved the sport for more than 45 years, averaged over 200 for several seasons, and learned quite a bit with research and experience. Archives
February 2023
Categories |
 RSS Feed