|
Bowling is a game of “Consistency”. The more consistent you release the ball correctly, the more you stand on the correct board, and the more you release the ball correctly and get it over the correct target every time, the higher and more consistent your scores are going to be! Using the same equipment every week will also help you achieve this consistency and will help you get to that desired 200 average! If you are using an alley ball right now, it has probably been difficult for you to locate that same ball every week. The best thing to do is to either buy your bowling products online or visit your local pro shop (located in most bowling centers) and get the best equipment to help you get to that next level. The pro shop is great because he/she can answer any questions you may have about any of the products listed below.
The pro will drill the finger and thumb holes to a custom fit. Sometimes the cost of the drilling is included in the price of the ball. If possible, it’s best to get a new ball several weeks before you begin a league so you will have some time to practice with it. Let the pro know if you throw a hook or not. If you don’t, you may want to learn how to throw a hook and can get a lesson or two from this professional so he/she can see the type of “Bowling Style” you have. They can recommend the proper ball for you (we will discuss bowling styles later on in the blog). Bowling balls vary in price, and I live by the saying “You buy cheap, you buy twice”, so I recommend getting a good ball right from the start (I will be discussing bowling balls in detail in next week's blog). If your fingers are strong, I recommend getting a finger-tip-grip- drilled. This allows your fingers to be inserted only up to the first joint but will allow you to get more “Lift” on the ball when releasing it (we will discuss lift at a later time). You can also purchase a see-saw-towel so you can clean your ball and place the ball inside of it right in your bowling bag. 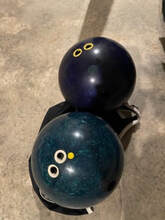 Bowling Balls 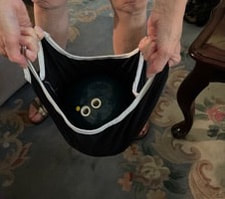 See Saw Towel 2. “BOWLING SHOES”-- They have so many nicer styles nowadays than when I first started to bowl. Some look like sneakers and are just as comfy. Sometimes i’ve seen kids trying to bowl in socks, but the lane has “Oil” on it and you could fall and get hurt, so get yourself a good pair of these special bowling shoes since you will be using them every week and for at least 2-3 hours in a bowling league. Bowling shoes have a special sole on them that allow you to slide as you release the ball to help the ball land smoothly onto the lane. Try NOT to step in any wetness while wearing them or you will stick on the lane and might go over the foul line. When renting shoes at the bowling center, make sure you wear socks since others have already worn them. Shoe rental prices at bowling centers can range from $3-$4 every week. (More on shoes in a later Blog Post) 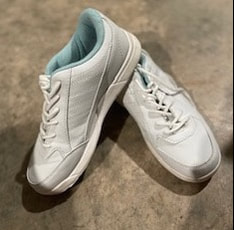 Bowling Shoes 3. SHOE COVERS: These have elastic around them so you can slip them on easily over your bowling, then if you need to use the restroom, you won’t have to keep changing your shoes and these will prevent you from stepping in any water. 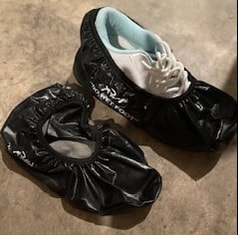 Shoe Covers 4. WRIST SUPPORT: A wrist support helps the wrist to stay strong and not to “Break” or bend down when you deliver the ball onto the lane since the ball is heavy. There are several different kinds to choose from. I have always used the “Mongoose” which has a piece of metal in it for a stronger wrist support, while allowing me to be still be able to shift my hand in different positions for the release. Some can restrict movement of the wrist, so ask the pro at the shop to recommend a good one for you. 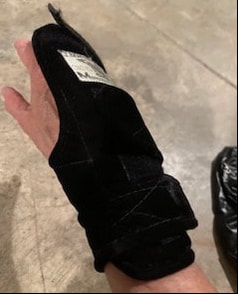 Wrist Support 5. BOWLING BALL TAPE: After you purchase a ball, the pro will drill the finger and thumb holes for you but may drill them a tad larger which allows for occasional finger swelling. I like to use this special tape so I can get the perfect fit each time I bowl. I use the “White Gripping Tape” in the thumb hole to help me get a more snug fit and a better grip on the ball. Just don’t make it too snug, some days you might need a few pieces and some you may not need any. To apply the tape, have a small pocket KNIFE in your bag to help you get it into the hole easier and insert with the straight side facing down toward the bottom of the hole and on the side that the inside of your thumb will be facing (so you can feel the tape as you are releasing the ball). They also sell a thinner black tape that you can use on the opposite side of the white tape so you can get the grip that feels just right for you by combining both. 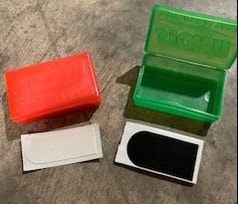 Bowling Tapes 6. EASY SLIDE: In my bowling bag I keep this product on hand so if the bottom of my bowling shoes should get a little wetness on them, I can dry them with a towel and then pat the area LIGHTLY with the easy slide on the sliding shoe (left shoe if you are a right handed bowler and the right shoe if you are a lefty). If you put too much on, you may slide over the foul line, so be careful. 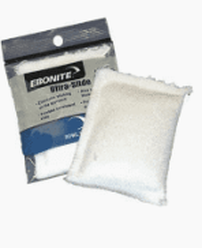 Easy Slide 7. ROSIN BAG: I also recommend getting a Rosin Bag. This will help your fingers and hand to stay dry so you will be able to hold onto the ball until you are ready to deliver it onto the lane. Just hold it in your bowling hand for a few seconds to help whisk moisture away before you insert your fingers into the ball. 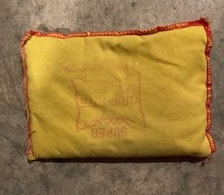 Rosin Bag 8. DEFENSE SKIN PROTECTOR: Formerly called “Nu-Skin”, is a must have in your bowling bag. If you get a cut or sore on one of your bowling fingers, you can put one of the little patches on over the area with the liquid provided, . It dries very quickly and you will be able to bowl as if there was a new piece of skin on your finger because it will no longer hurt.! The patches are super thin, allowing your fingers to still fit properly into the holes in the bowling ball. 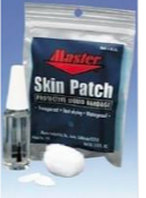 Defense Skin Protector 9. It is also important to have a small BOWLING TOWEL or microfiber towel in your bag to keep your hands and fingers dry. The bowling centers do provide little blowers (fans) near the ball return on each pair of lanes for this purpose, but you can use the towel to wipe debris off the ball after every few shots too.  Bowling Towel 10. Bowling Ball Cleaner-- Sometimes you get debris on the bowling ball that a towel just can't remove. You can purchase special liquid cleaners at the pro shop called "Monster Tac", "Tac Up", or "Reacta Shine". You can spray these products onto a paper towel or a small regular towel and wipe the ball thoroughly. You can also clean it with a mixture of equal parts of water and rubbing alcohol or just use some windex on a towel or paper towel. Clean your bowling ball before you bowl because you are not allowed to clean it once the competition begins according to the USBC (United States Bowling Congress) rules. 11. Lastly, you will need a BOWLING BAG to keep all of your equipment in. They sell them online or in the pro shop and bags can accommodate from 1-6 bowling balls! I use a 3 ball carrier to take back and forth with me to the lanes. If you are lucky enough, they do rent lockers that provide only enough space for a few bowling balls, or a 1 ball carrier. You can leave the heavy ball/s in it and just take your bag with your other things back and forth with you.  3 Ball Carrier I also recommend getting a small spiral NOTEBOOK that you can keep in your bag. You can take notes as you learn more in your practice sessions and refer to them on league days when needed. Read your notes often, especially when learning new things. Good Luck & High Scoring!! Join me next week when I’ll be discussing about "How Bowling Balls Get Made".
0 Comments
Leave a Reply. |
AuthorHello!! My name is Joanie. Although I'm not a professional bowler, I have loved the sport for more than 45 years, averaged over 200 for several seasons, and learned quite a bit with research and experience. Archives
February 2023
Categories |
 RSS Feed